Showing posts with label breads. Show all posts

Friday, May 27, 2016

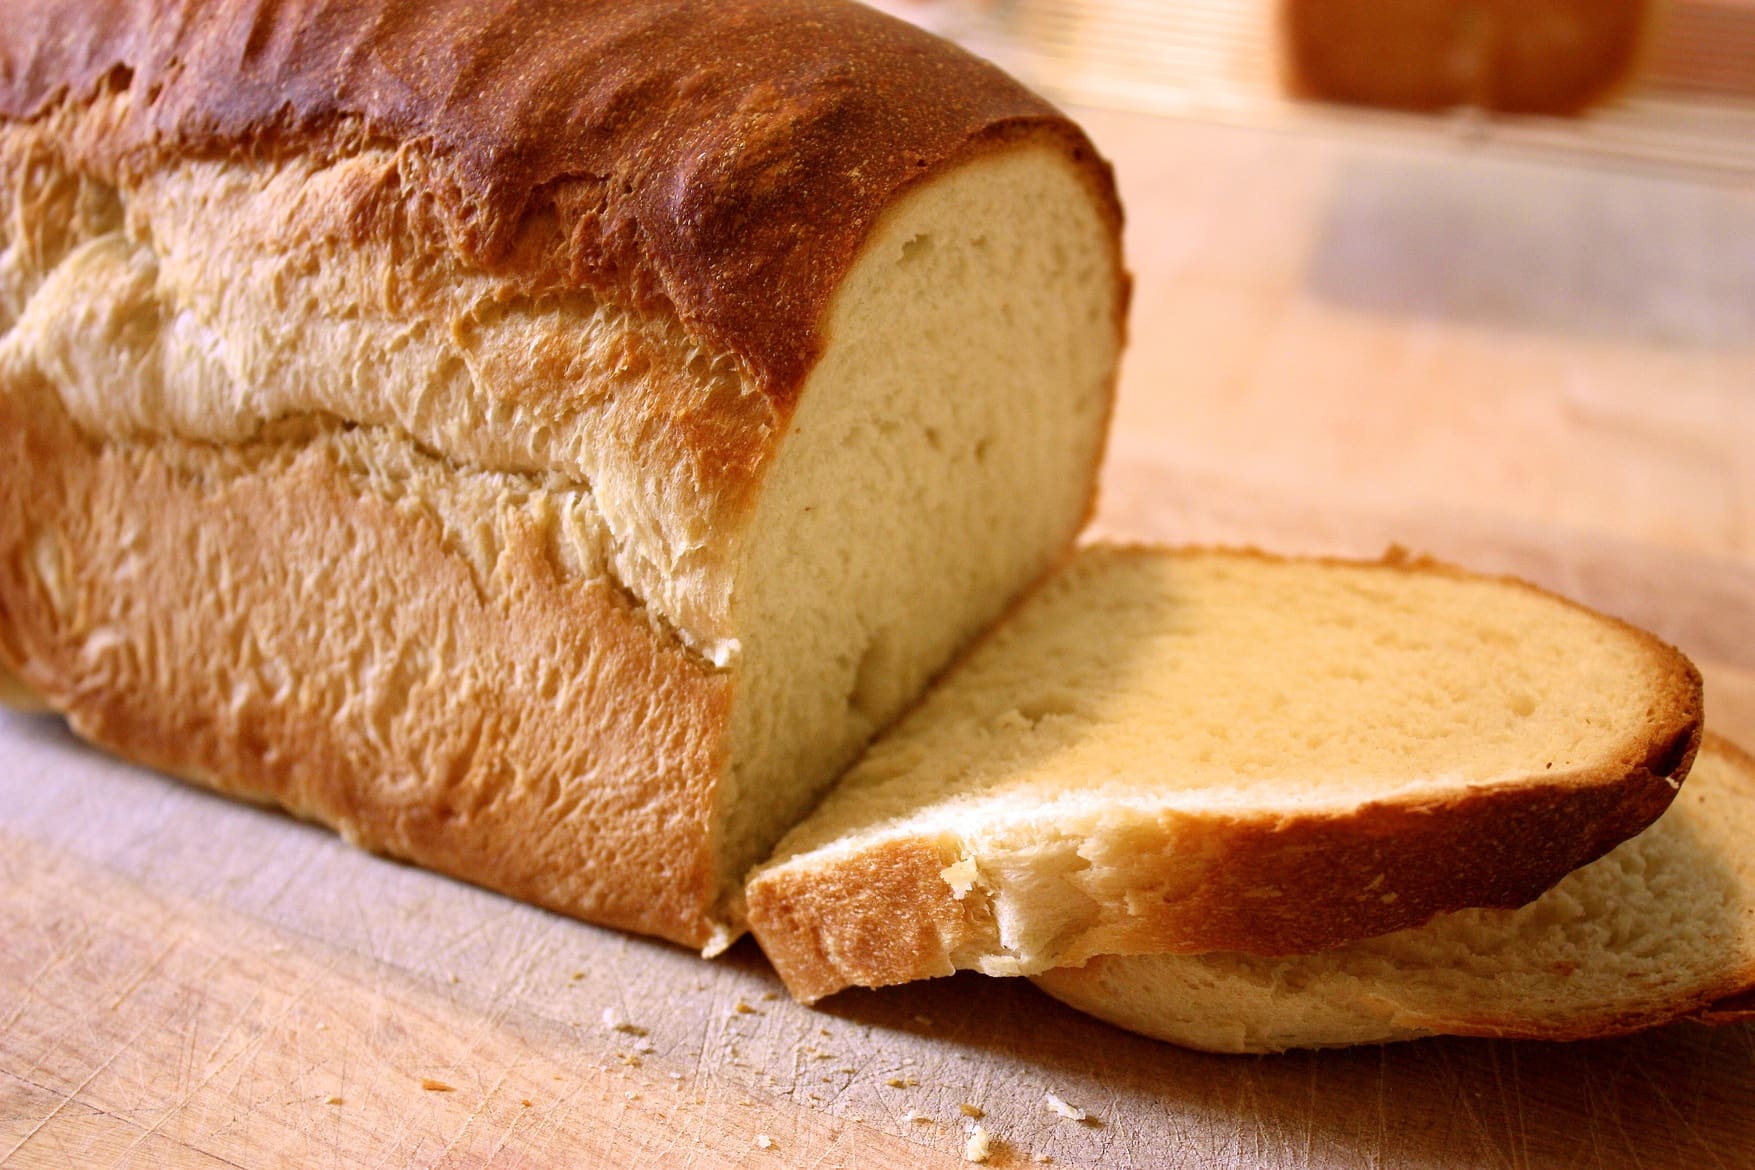
Sourdough White Bread

I have dipped my toes in the sourdough world. I didn't realize it was such a huge thing, and I didn't realize that sourdough starters needed to be babysat. I have a CP recipe for sourdough starter that I didn't use. It isn't "real" sourdough because it calls for yeast in the starter According to my internet recipe, real sourdough starter is leavened with wild yeast and bacteria from the water, flour, container, and air, and that is what you are trying to cultivate by babying your starter.

The CP recipe is as follows:
This is my sourdough storage method. Right now it
 needs to be fed and the liquid stirred back in.
2 c warm water
2 c flour
1 t yeast

Combine in a glass plastic or crockery container. Let stand for several days. The starter improves with age. *****If starter is stored in the fridge remove it the day before you are going to bake. Add warm water and flour and let it work until your starter is bubbly.

I wanted to try the method with no added yeast. My first attempt was something like 1/2 c flour and 1/4 c water. It failed because I used whole wheat flour, and there wasn't even enough water to wet all the flour. I tried again and followed different measurements from a recipe on Allrecipes. I mixed the flour and water and then let it sit, stirring two times a day. It was a big failure. I obviously was growing the wrong kind of bacteria; my starter smelled like a mixture of Parmesan cheese and vomit. Even C was walking around the kitchen asking what smelled so bad.

I tried again, this time after reading a blog dedicated to sourdough. I used 50 g water and 50 g flour. I started with ww, then followed the blogger's advice to use white instead to make it easier. Everyday I measured out 50 g of the starter and discarded the rest, then added 50 g water and 50 g white flour. Success! I did this for a week (the last couple days I didn't discard any starter) before using it in the recipe below. My starter never got to the point where it overflowed the container. It did bubble up an inch or so on the jar, but that's the most active it has been. I started feeding it whole wheat flour now to see how it changes the sourdough taste.

This isn't real sourdough bread because it has added yeast in it. I thought that was a good idea for my new starter since it isn't robust enough to leaven a bread.


Sourdough White Bread

2 c sourdough starter
2 t salt
1 pkg active dry yeast
1/3 c dry milk
3 t honey
1 c warm water
2 T oil or margarine
4-5 white flour

1. Combine 1 1/2 c flour, all dry ingredients and mix well.
2. Add oil, honey, and water. Mix 2 minutes on medium speed on electric mixer.
3. Add sourdough starter and 1/2 c flour. Mix two minutes on medium speed.
4. Work in additional flour until a soft dough is formed.
5. Knead on pastry cloth or board for 8-10 minutes.
6. Place in greased bowl, cover, and let rise until doubled (about 1 hour).
7. Punch down, turn over, and let rise again (about 30 minutes).
8. Punch down the dough as divide into two pieces.
9. Shape into loaves placing them in a 9x5x3'' greased pan or a cake pan.
10. Bake at 400 degrees F. for 40-45 minutes.
11. Cool on wire rack.

It was good bread, not as exciting as I imagined. The sourdough taste was very mild. It has been so long since I've made all white bread, that it was almost like cake. 40-45 minutes at 400 is way to long for 2 rather small loaves. They barely got to 30 minutes before I pulled them because they were too brown.

This was the most basic of the sourdough recipe in this little set. I'm looking forward to some of the other things, like sourdough pancakes and doughnuts.

Wednesday, May 11, 2016

Casserole Herb Bread

I took a break while we moved. Last night I needed a bread to go with the lentil spinach soup, and this one seemed pretty easy.

Place in this order in bowl:

1 pkg. active dry yeast
1 3/4 c flour
2 T sugar
2 T shortening
1 t salt
1 t parsley flakes
1/2 t marjoram
1/2 t oregano
1/4 t garlic powder
2 eggs
3/4 c milk

Beat at medium speed for three minutes. Turn into well greased 2-quart casserole or bundt pan. Cover; let rise 30 minutes, or until light. Bake at 350 degrees for 25-30 minutes. Remove from casserole immediately.

I don't have a classic casserole, so I used a bundt pan. The bread was fine. It tasted good and was easy, but it wasn't spectacular. I might make it again when I need something that doesn't require much effort. It would be really good with a bunch of Parmesan cheese mixed in.

Thursday, March 24, 2016

Chocolate Braids

In one of the issues of Taste of Home that I have, there is a section of Easter breads. I've wanted to try some, and I finally made one. I still want to try walnut-filled coffee cakes and two-toned yeast bread, but I'm not interested in the pistachio ring. Sounds like something Ben Joslin would like.

ToH's picture

Chocolate Braids

TOTAL TIME: Prep: 40 min. + rising Bake: 30 min. + cooling
MAKES: 16 servings

Ingredients
2 packages (1/4 ounce each) active dry yeast
1/2 cup warm water (110° to 115°)
1/3 cup honey, divided
6 tablespoons butter, softened
1 egg
My picture
1/2 cup baking cocoa
1/2 teaspoon salt
2-1/2 to 3 cups bread flour
CREAM CHEESE FILLING:
4 ounces cream cheese, softened
1/4 cup sugar
1/4 cup all-purpose flour
1 teaspoon vanilla extract
1/4 teaspoon ground nutmeg
TOPPING:
1/4 cup all-purpose flour
1/4 cup sugar
1/2 teaspoon ground cinnamon
2 tablespoons cold butter
1/4 cup chopped macadamia nuts
ICING:
1-1/2 cups confectioners' sugar
1 tablespoon baking cocoa
1/4 teaspoon vanilla extract
3 to 4 tablespoons 2% milk

Directions
In a large bowl, dissolve yeast in warm water. Add 2 teaspoons honey; let stand 5 minutes. Add butter, egg, cocoa, salt, 1-1/2 cups bread flour and remaining honey. Beat 2 minutes or until smooth. Stir in enough remaining bread flour to form a soft dough.
Turn onto a floured surface; knead until smooth and elastic, about 6-8 minutes. Place in a greased bowl, turning once to grease top. Cover and let rise in a warm place until doubled, about 1 hour.
Punch dough down; divide in half. On a lightly floured surface, roll one portion into a 12x7-in. rectangle.
In a small bowl, beat filling ingredients until smooth. Spread half of the filling over dough to within 1 in. of edges. Roll up jelly-roll style, starting with a long side; pinch seams to seal.
Place seam side down on a large greased baking sheet. With a sharp knife, cut roll in half lengthwise, leaving one end intact. Carefully turn cut sides up. Loosely twist strips around each other, keeping cut side up. Pinch ends to seal. Repeat with remaining dough and filling. Cover and let rise in a warm place for 30 minutes.
Preheat oven to 350°. For topping, combine flour, sugar and cinnamon in a small bowl; cut in butter until crumbly. Add nuts. Sprinkle over loaves.
Bake 30-35 minutes or until golden brown. Remove from pans to wire racks to cool. In a small bowl, combine confectioner's sugar, cocoa, vanilla and enough milk to achieve desired consistency; drizzle over warm loaves. Yield: 2 loaves (8 slices each)

Nutritional Facts
1 slice equals 274 calories, 11 g fat (6 g saturated fat), 36 mg cholesterol, 147 mg sodium, 43 g carbohydrate, 2 g fiber, 5 g protein.

It was very good. Brian liked it enough that I marked it as a favorite. I liked it, but not as much as Brian. I almost didn't include the macadamia nuts because $$$, but I'm glad I did. Other nuts would probably be okay, but I liked the macadamia nuts a lot. It was very tedious to make, so I probably won't make it much. Cinnamon rolls are easier than this. Plus, look at the nutrition facts. Brian ate 7 pieces. Ha ha ha ha ha.

Friday, September 18, 2015

E-Z Homemade White Bread

I don't really make bread. I should, but I don't. However, we really needed some, so I whipped up this recipe, the original bread machine recipe from our growing up! It says that the price is $.38 per loaf, but I'm sure that has gone up a little over the years. Did anyone else have this recipe memorized? I remember not even using the recipe after having put it in the bread machine so many times!
Thanks speedbump kitchen for the picture!

Ingredients for 1 1/2 lb. loaf:
1 1/8 cup water
1 1/2 tablespoons butter
3 tablespoons sugar
1 1/2 teaspoons salt
1 1/2 tablespoons dry milk
3 cups flour
1 1/2 teaspoons active dry yeast

Guidelines at a glance (paraphrased):
1. Put ingredients in in order listed.
2. Set bread machine and let it go.

So, it was okay, but there are many other bread recipes that I actually like better. It was good to eat with our dinner that night.

Monday, August 3, 2015

Zucchini Bread


Bisquick Zucchini Bread

2 c. Bisquick
1 1/2 c. zucchini, shredded
1/4 c. vegetable oil
3/4 c. sugar
3 eggs
1 tsp. vanilla
1 tsp. nutmeg
2 tsp. cinnamon
1/2 c. nuts, chopped

Heat oven to 350 degrees. Grease bottom only of loaf pan. Beat all ingredients on low speed, scraping bowl constantly, 30 seconds. Beat on medium speed, scraping bowl occasionally. Pour into pan and bake until toothpick comes out clean, 50 to 55 minutes. Cool 10 minutes; remove from pan. Cool completely before slicing. Store in refrigerator.

I made the bisquick with 2 c flour, 1 T baking powder, and 1 t salt. 

Meh, it was zucchini bread. There was nothing wrong with it, but there are other ways I prefer to use my zucchini.

Friday, October 24, 2014

Pumpkin Cornbread

I know Joanna just posted a good-looking recipe, so don't forget to look at that, but I wanted to get this one posted before chili cook-offs. If you are supposed to make cornbread for your chili cookoff, here's a good recipe.


Pumpkin Cornbread

1 c flour
1 T baking powder
1 t salt
1/2 t cinnamon
1/4 t nutmeg
1/2 c brown sugar
1 c cornmeal
2 eggs
1 c pumpkin
1/4 c oil
1 T honey/molasses

Bake at 400 degrees for 25-30 minutes.

I cheated a little and substituted the flour/baking powder/salt with food storage pancake mix that expired. I also decreased the sugar a little since the pancake mix has some. It was good! I usually prefer sweet cornbreads, and this falls in the category. I made it to go with a pumpkin chili. I couldn't taste the pumpkin in the chili, but the cornbread had the perfect amount.


Monday, August 18, 2014

Wheat-Flour Tortillas

I've tried posting this recipe three different times, but I couldn't find the card the recipe was written on, then I couldn't find the picture I took. Here it finally is. I was really excited about these because I like whole wheat tortillas. I was a little sad when I finally started making the recipe because it wasn't for whole wheat tortillas; it was for wheat tortillas using white flour, as opposed to corn tortillas. I used some whole wheat flour anyway.

6 c all-purpose flour
1 t baking powder
2 t salt
1 heaping c. shortening
2 c. warm water, or a little more

Mix dry ingredients, work in shortening with hands until consistency of oatmeal, then pour in lukewarm water all at once. Mix well and knead 2-3 minutes. Coat with a little oil and put into a plastic bag for 20 minutes.

Take a large piece of dough and squeeze out a portion the size of a ping-pong ball. Roll in hands til smooth. Flatten ball slightly, then roll with a pin to size of a saucer.

Cook on hot griddle til cooked thru and golden brown.

They were good, but probably not worth the effort. I had a very hard time getting them thin, and many of them ended up crispy around the edges. I heard Mom say once that she had tried making homemade tortillas (probably this recipe) a few times, and decided it wasn't worth it. I agree. It's cheap, but I can usually buy a package of 10 tortillas for under $1 anyway.


Sunday, June 29, 2014

Whole Wheat Cinnamon Raisin Muffins

I love english muffins. My favorite way to have them is toasted with honey butter slathered on top. Yum. I could eat half a dozen at a time (and have).   I have been wanting to make these for awhile now.  I love the recipe in the Allred Cookbook, but they aren't whole wheat.  So when I saw these in my pile I shouted with joy.

Whole Wheat Cinnamon Raisin Muffins

Split these muffins with a fork and toast the cut sides.  Serve with yogurt cheese and fruit conserve.

1 T dry yeast
1/4 c warm water
1 t honey (we are out, so I used maple syrup)
1 3/4 c warm milk
3 1/4 c whole wheat bread flour
1/4 c wheat germ (I suggest getting it before you are in the middle of the recipe and have to run to Walmart...)
1 1/2 t cinnamon
1/2 c raisins

NOTE: I omitted the cinnamon and raisins because I wanted a more versatile muffin.  

In a small bowl, dissolve the yeast in the water and add the honey.  Set aside to proof ten minutes. 

In a larger bowl, combine the milk, bread flour,wheat germ, and cinnamon.  Add the yeast mixture and raisins and beat well.

Cover and let rise in a warm place until double in bulk (about one hour).

Heat a heavy griddle, skillet, or baking sheet on top of stove.  Brush with oil.  Grease several crumpet rings, small tuna cans with both ends removed, or canning jar rings.  Keep the heat under the griddle low.

NOTE:  I prefer to use the electric skillet Grandma gave us when we got married.  It has a lid, so the middle gets cooked through better than on a griddle. 
 
With a spoon or ladle, half fill the rings.  Cook the muffins about 6 minutes on each side or until brown on both sides.

Yield: 15 muffins
Approximately 157 calories each


Here are my thoughts on this recipe.  It was not near as liquidy as the recipe made it out to be.  I cut the dough with my jar ring, instead of filling the dough into it.  I had to add more water to get it even that liquidy.  In the end, it didn't seem to make much of a difference anyway.

My other issue was with rising times.  The recipe I normally use says to rise 12 hours at least.  This only said one and when I went to check it after an hour it had risen, but didn't taste like english muffins.  So I let it rise overnight and it was much better in the morning. 

Other than that it was a great recipe.  We have already eaten half of them and I just made them yesterday.  We eat them for breakfast, lunch, dinner, and snack.  Yesterday we used them for mini pizzas. 

I will definitely make this again with a few tweaks based on my last experience.

Thursday, June 5, 2014

Strawberry Bread

Surprisingly, I also had a recipe for strawberry bread among my collection. I don't ever remember eating any of Sarah's magical strawberry bread that she made. I checked and this is a different recipe, so if you are too afraid to try her recipe, give this one a try.

With plenty of butter :)
Strawberry Bread modified from Creating Christmas Memories (Have I missed something? Strawberries aren't in season at Christmas.)

1 1/2 c. flour
1 c. sugar
1/2 tsp. baking soda
1/2 tsp. salt
1/2 c. chopped pecans
10-oz. package frozen strawberries, defrosted
2 eggs
1/2 c. oil
1/2 tsp. vanilla

Mix all ingredients. For easy removal, grease loaf pan, cover bottom with wax paper trimmed to fit, and grease again.

Bake at 350 degrees for 50 minutes to 1 hour.

Makes 1 loaf. 

Excellent recipe! My favorite part about it was the instructions on how to get it to come out of the pan easily were longer than the instructions on how to make it. I do not enjoy having to mix wet and dry ingredients in different bowls and then do all sorts of fancy things. Too much work and too many dishes!

I had to bake it about 15-20 minutes longer then the recipe suggested, but I'm pretty sure that is my bread pan's problem, not the actual recipe's problem. Maybe one day I'll get at least one good for bread.

I will admit I was a little bit worried knowing the history of strawberry bread in our family. I just used some strawberries I froze last summer (that I got on a killer sale!) so I was unsure if it was even close to 10 oz. I feared that I would end up with a brick instead of a nice loaf. Even without defrosting them all the way, it still turned out pretty nicely. I included the nuts (walnuts instead of pecans because that's what I have) which may have helped it stay a decent consistency.

And, I was going to say I am eating a slice as I type this in, but it was gone before blogger opened the page. Yum!

Thursday, February 27, 2014

Brigham's Buttermilk Do-nuts

I needed something to do on yet another frigid afternoon, so I looked through and found this recipe.

Brigham's Buttermilk Do-nuts

2 cups buttermilk
2 lg. eggs, beaten
1 c. sugar
5 cups sifted flour
2 teas. soda
1 " baking powder
1 " salt
1 "nutmeg
1/4 cup melted butter or shortening

Combine buttermilk, eggs, and sugar and blend well. Beat in sifted dry ingredients, then stir in melted butter. Roll or pat dough on floured board about 1/4 inch thick and cut w/do-nut cutter. Fry in hot fat. Drain and sprinkle w/sugar. Makes 2 doz. do-nuts.

I debated about whether to half it or make the whole recipe, but I went with the whole recipe. I wasn't sure if I added in the whole 5 cups of flour (pregnant moment?) so I added a little extra flour in  just in case. I had to use a lot on my floured board because the dough was really sticky.
I had to improvise when it came to a donut cutter. I used a large mouth canning ring and then a small medicine cup (it was on the counter) to cut out the donuts and I think it made a good combination. It did require a lot of fat (I used vegetable oil) to fry them. I used the electric skillet we got from Grandma when we got married. It keeps the oil at a pretty even temperature.
Look how pretty...and fattening.

The recipe made over two dozen. And, when I took them out to drain and sprinkle with sugar. The sugar did not stick on the donuts very well. I used powdered sugar on the first batch, cinnamon sugar on the second batch, and then a lemon glaze on the rest because Big Chubb always wants things to have a little bit of tartness aka lemon juice added to them.
Little Chubb enjoyed a little donut just his size while watching George snuggled under some blankies to help him get over his cold. And, this baby better be massive because I'm having a hard time keeping a healthy diet.

Overall, I probably won't make them again just because frying donuts is more time consuming and labor extensive than I want to put forth. The donuts were ok. The were a little denser than I was hoping for maybe because I added too much flour to the recipe? I don't know.


Monday, February 3, 2014

Easy Dinner Rolls

Easy Dinner Rolls

By MizzNezz

Added September 19, 2002 | Recipe #40633

Yield: 24 rolls

1 cup water (110 degrees F)
2 packages yeast (Do not use the quick rising in this recipe)
1/2 cup butter, melted
1/2 cup sugar
3 eggs
1 teaspoon salt
4 1/4 cups flour

Directions:

1. Combine water and yeast in lg bowl; let stand for 5 minutes.
2. With wooden spoon, stir in butter, sugar, eggs and salt.
3. Add flour, 1 cup at a time and beat in as much as you can.
4.  (you will probably be able to use all the flour) Cover and refrigerate for at least 2 hours, or up to 3 days.
5. Grease a 13x9 baking pan.
6. Turn dough out onto floured surface.
7. Divide into 24 equal pieces.
8. Roll each piece into a smooth round ball.
9. Place in rows in prepared pan.
10. Cover and let rise for 1 hour; until doubled.
11. Heat oven to 375*.
12. Bake until golden brown, about 17 minutes.

The dough is very soft and sticky.
After rising for 2+ hours in the fridge. Notice it isn't nice and smooth and elastic-y.

I tricked him into eating more dinner by telling him that I would take pictures of him eating :)

Ben asked if I wanted him to take the picture so I could proudly show off my rolls.... And, that is a pretty decent shot of our sad kitchen, though it is giving the allusion that it is deeper than it really is.
I made these tonight to go with some carrot soup. They turned out pretty good. My only complaint was that even though they say they are easy they had to rise forever! I didn't plan in the second rise time, but luckily I tricked them to rise faster by warming the oven up pretty warm. Ben liked them, but said they were crumbly and not as good as the rolls Mom usually makes. And, Russell actually ate two of them!

If you want the nutrition information you can go to recipezaar.com and search for the recipe number. I suggest not doing it because they are not healthy.

Sunday, February 2, 2014

Four Week Bran Muffins

We had these muffins quite awhile ago, and I'm just now getting around to putting them up. Sorry. I had been looking for a refrigerator bran muffin recipe a while ago, so I was happy to see this one. This comes from the Eating Well...While Spending Less packet from North Dakota State University.

Equipment you will need
-measuring cup
-measuring spoons
-mixing bowl
-mixing spoon
-plastic wrap or cover
-muffin pan

Ingredients

4 eggs
1 cup soft or melted margarine
1 quart buttermilk (or sour milk*)
1-1/2 cups sugar
5 teaspoons baking soda
1-1/2 teaspoons salt
1 (15 ounce) package raisin bran cereal (or 9 cups bran flakes with raisins)
5 cups flour

To make the mix

1. Break eggs into a large bowl and beat well.
2. eat in margarine, buttermilk, and sugar until well mixed.
3. Add baking soda and salt. Stir well.
4. Mix in raisin bran.
5. Add flour and stir until just mixed. The batter will be thick.
6. Cover and store in the refrigerator. The batter will keep about four weeks if the refrigerator is at 40 degrees.

To bake the muffins

1. Preheat oven to 400 degrees.
2. Grease muffin pan or use paper baking cups.
3. Take batter our of refrigerator.
4. Fill each muffin cup 2/3 full.
5. Bake in oven at 400 degrees about 15-20 minutes, until brown.
6. Return leftover batter to refrigerator.

Makes 6 dozen muffins

*To make sour milk, mix two tablespoons lemon juice or vinegar with two cups skim milk.

I'm pretty sure I halved the recipe because 6 dozen muffins would take us more than 4 weeks to go through, even baking them up a few at a time. Even though I halved the recipe I don't think we got 3 dozen muffins from it (and we have small muffin pans). And, I think I used plain bran flakes instead of raisin bran.

We enjoyed them twice. Once right when I mixed them up. The second time was a few days later, and they tasted just as good. The batter was very thick and scooped like ice cream after sitting in the fridge for several days. It was nice to have them already mixed up in the morning, so we could just bake them up to eat.

Monday, April 15, 2013

Double Chocolate Banana Muffins

We finally had some bananas that were past the ripeness we eat them at, so I could finally make this recipe for us to eat for breakfast this morning.


Ingredients

    • 1 1/2 cups flour
    • 1 cup sugar
    • 1/4 cup baking cocoa
    • 1 teaspoon baking soda
    • 1/2 teaspoon salt
    • 1/4 teaspoon baking powder
    • 1 1/3 cups mashed ripe bananas
    • 1/3 cup vegetable oil
    • 1 egg
    • 1 cup miniature semisweet chocolate chips

Directions

  1. In a large bowl, combine the first six ingredients.
  2. In a small bowl, combine bananas, oil and egg.
  3. Stir into dry ingredients just until moistened.
  4. Fold in chocolate chips.
  5. Fill greased or paper lined muffin cups three fourths full.
  6. Bake at 350 deg F for 20-25 minutes or until muffins test done.
They were pretty good. I'm not a chocolate baked goods for breakfast person, but I'm sure these won't last too long. My only complaint with the recipe was that I had to cook them about 26-27 minutes. 
And, they aren't healthy so I purposefully left the nutrition facts off.